Answer: Here are a couple of ways to make a buttonhole.
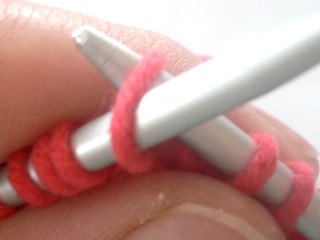
The simpliest button hole is to work a *yarn over, k2tog* combination at the point on the button band you want the button to be placed.
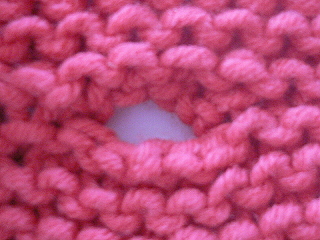
The result…
…is a small round button hole.
Two-row buttonhole
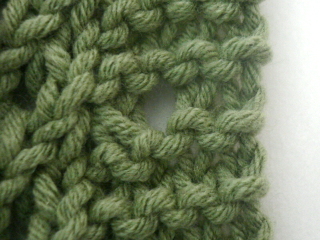
The two-row buttonhole makes a slit like opening, suitable for larger buttons.

To start, knit to the point where you want the buttonhole to start, then cast off the required number of stitches.

Keep in mind that knitting stretches and so do buttonholes, so don’t cast off more stitches than are absolutely necessary to squeeze a button through.
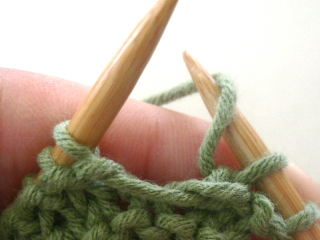
On the second row: Cast on the same number of stitches that you cast off the row before over the same spot.
To cast on in the middle of a row, use the backwards loop cast on (often called “M1”) or a knitted or cable cast on.
On the following row, you might want to knit the stitches before and after the newly cast on stitches through the back loop…
or pick up a loose stitch and knit it together with a neighboring stitch to tighten up any loose stitches.
The drawbacks of the two-row buttonhole are that it has a tendency to stretch and - particularly in stockingette stitch - the difference between the cast on and cast off edges is very noticeable and can be less than attractive…
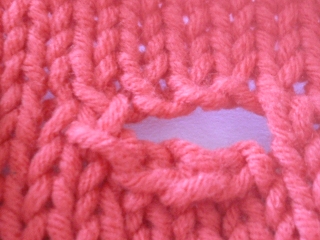
Though in a garter stitch border this is less noticeable, especially if you cast off in purl.
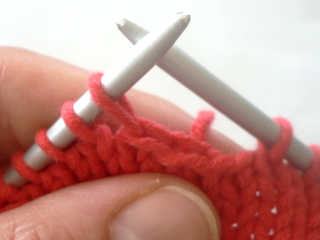
One-row buttonhole
The one hole buttonhole is a little more complicated to work, but is a bit firmer and – done well – neater.
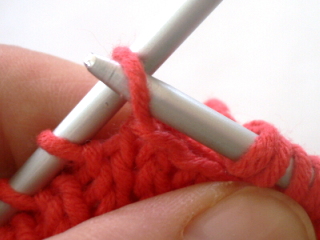
When you reach the position for the buttonhole, move the yarn forward to the front of the work, slip 1 stitch as if to purl then return the yarn to the back of the work, leaving a bar of yarn in front of the stitch…
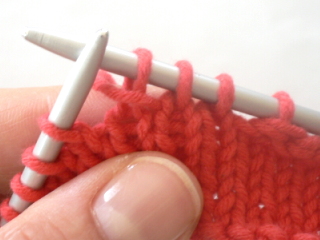
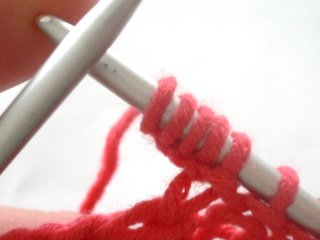
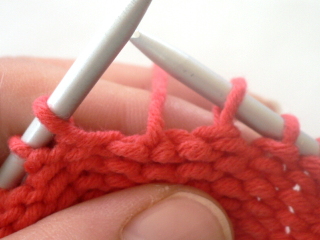
Then *slip 1 as if to purl from the left to the right needle, and pass the second stitch on the right needle over the first stitch, as for casting off* Repeat from * to * for the required number of stitches.
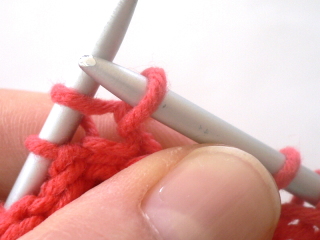
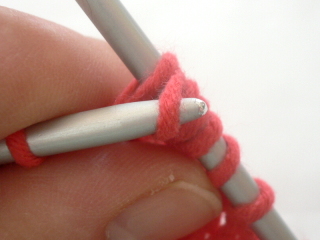
Now slip the last bound off stitch from the right needle back to the left as if to knit …
And turn the work…
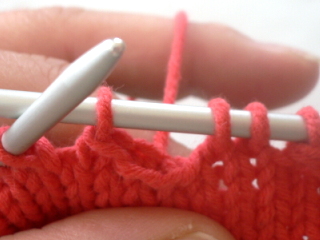
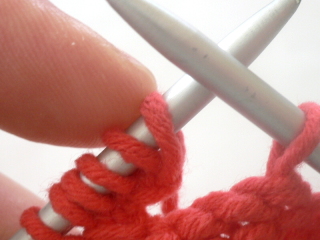
Then use a knitted on, cable or backwards loop cast on …
to cast on one more stitch than you cast off.
Turn the work again to face the right side and slip the first stitch on the left hand needle onto the right hand needle…
Then pass the second stitch on the right hand needle (the extra cast-on stitch) over the just slipped stitch to finish.
The resulting button hole is less likely to stretch than a two row buttonhole…